
Electrical Work, Work, Work
July 2025
I have been so deeply involved in the refit that I haven’t had time to update the blog for a bit, and it’s time for a general catch-up post on what’s been going on.
Electrical Work
The majority of the last month has been spent on redoing Blue Turtle’s electrical system.
I initially intended to do only two things: switch out the original flooded lead acid batteries for AGM batteries, and install a new Victron Multiplus II inverter/charger. While I would have liked to have gone straight to LiFEPO4 (lithium iron phosphate) batteries, which allow for faster recharging and more usable power, our insurance requires that any lithium upgrade be done by an ABYC-certified electrician. I did this on Wanderer, and ended up spending nearly $20,000 to have the entire job done correctly. Given the scope of the refit, I decided to go with AGMs for now, and to revisit the lithium option in a few years.
Flooded lead acid batteries - the kind you probably have in your car - have some serious drawbacks on a boat. Notably, when a flooded battery is charged, the electrolyte solution inside undergoes electrolysis, splitting into hydrogen and oxygen gas. This means you have to refill the batteries with distilled water fairly frequently, and also that you have hydrogen gas in your boat; while it’s usually fine, hydrogen gas is explosive, and not really my favorite thing to be generating in a compartment near the engine.
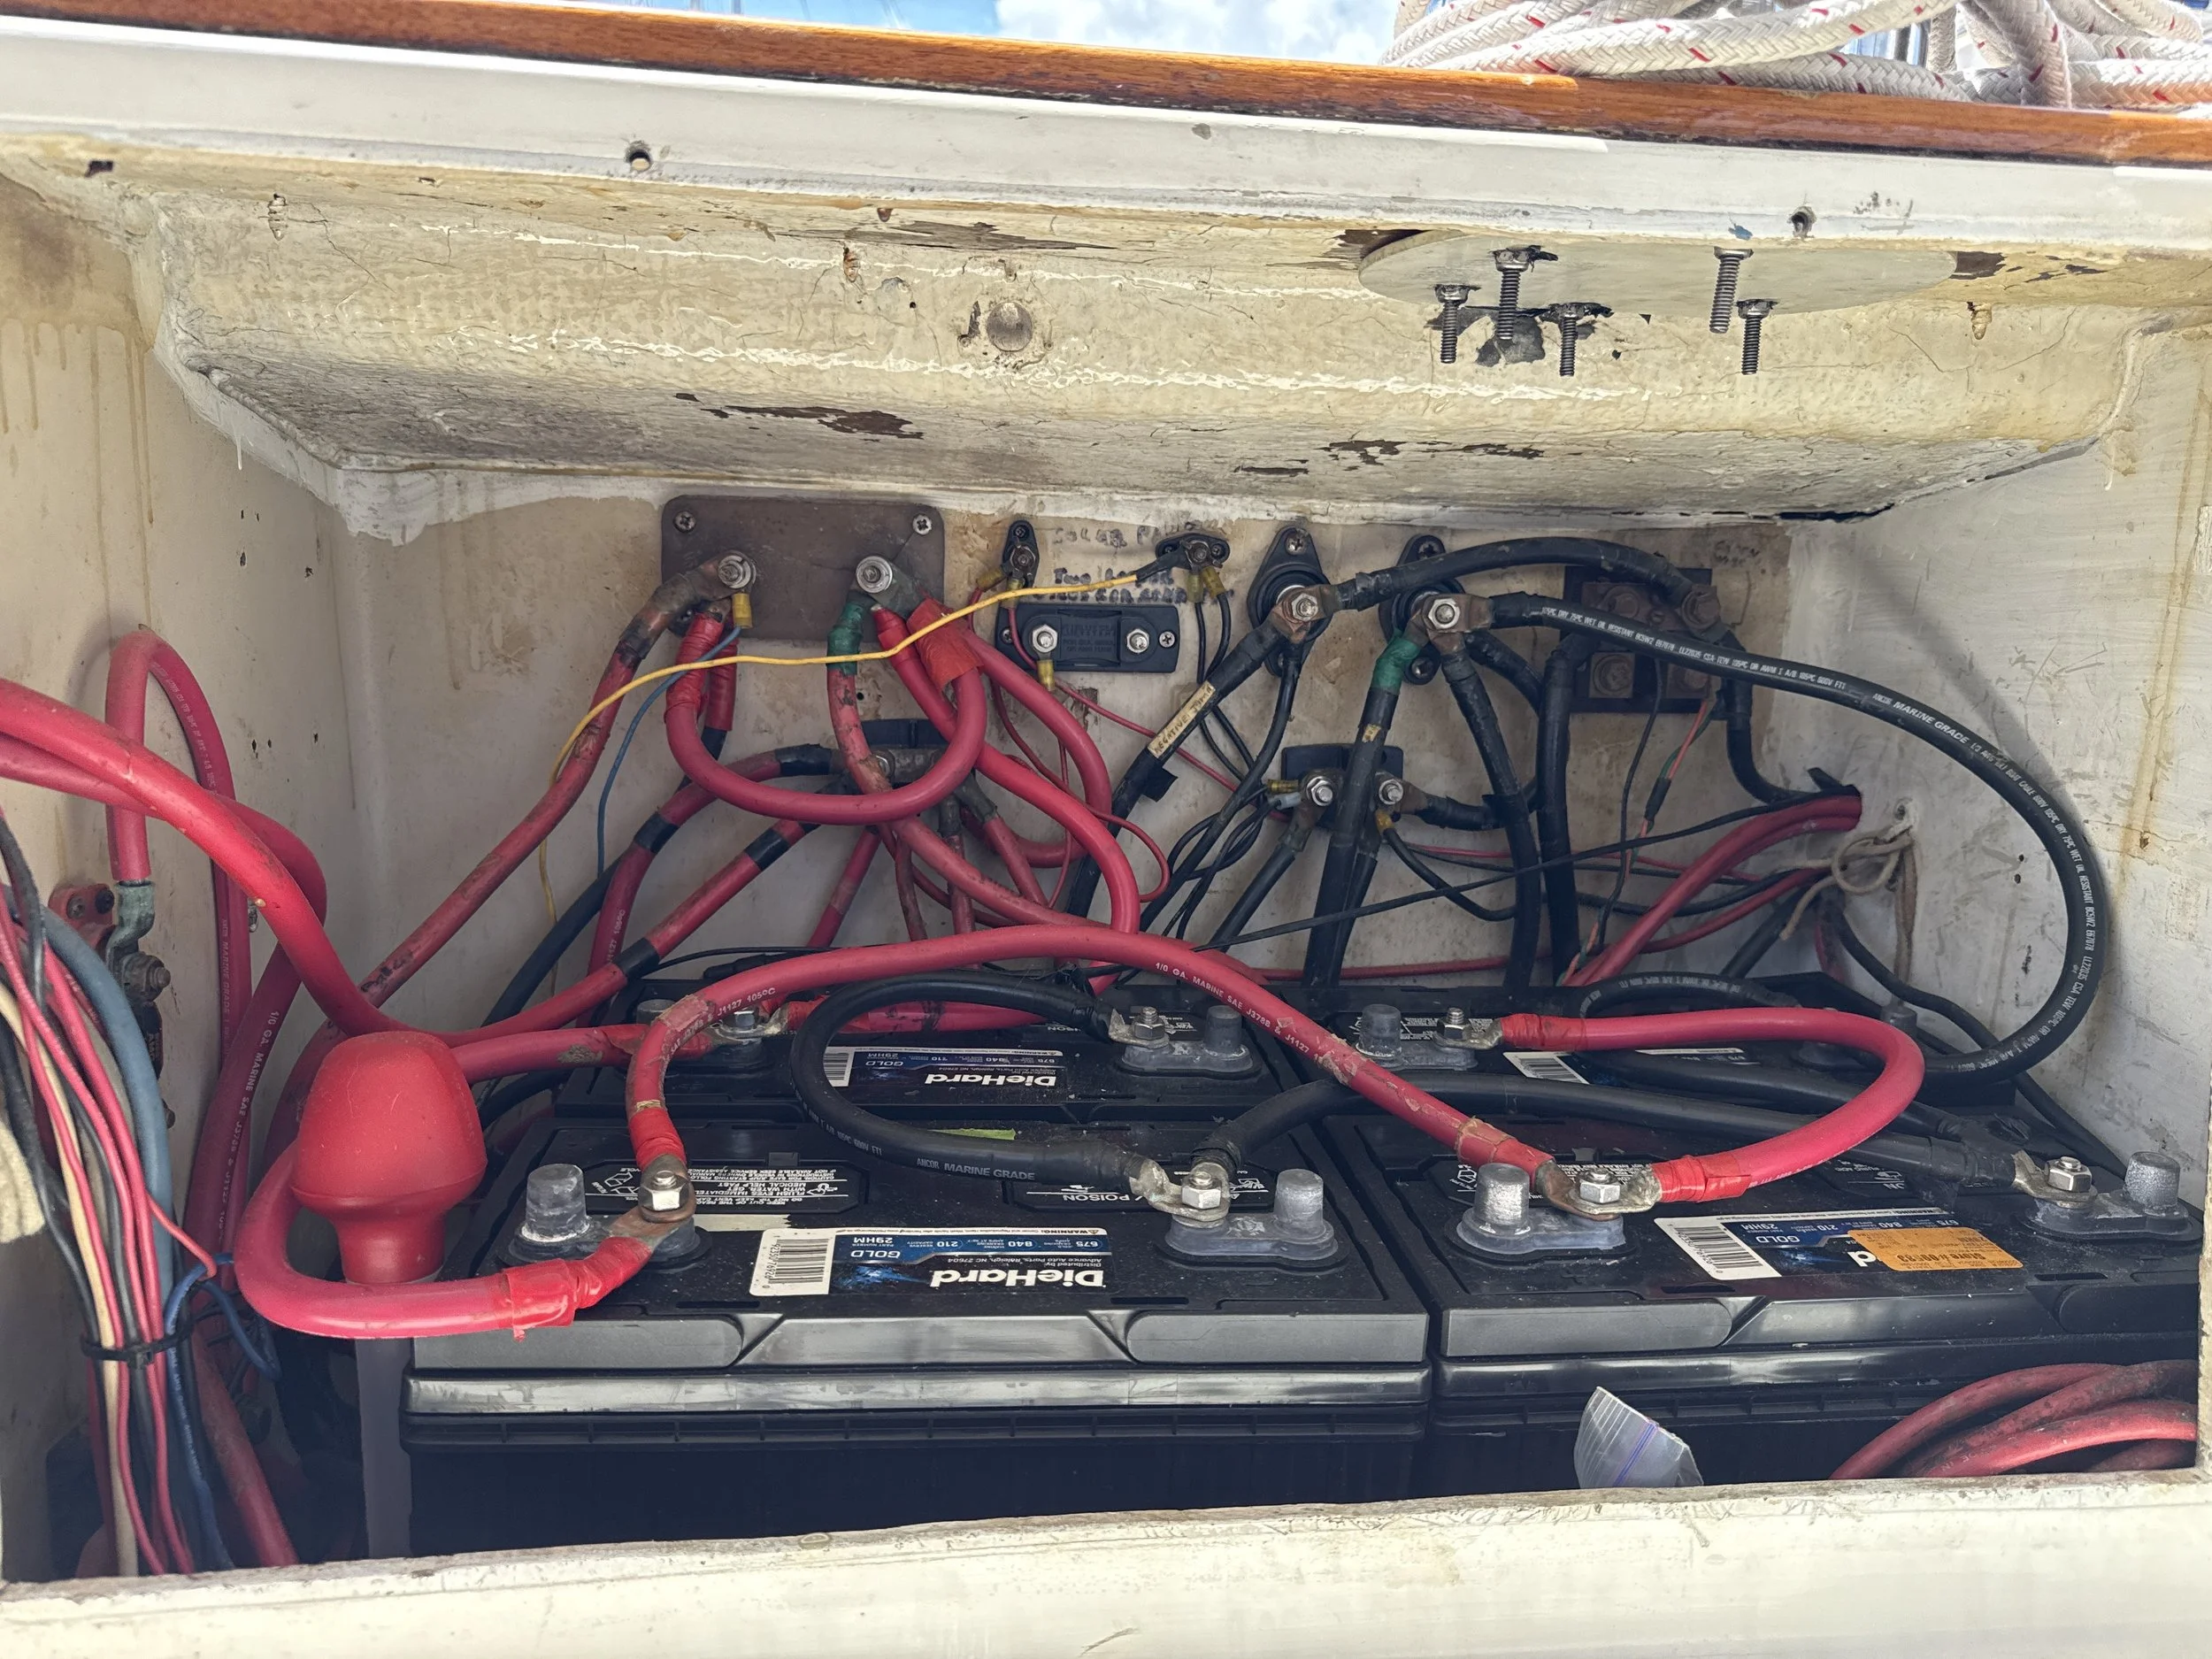
The original house battery compartment
AGMs are still flooded batteries, but they use fiberglass mats to trap the electrolyte, making them spill proof, sealed, and maintenance free. I opted for Lifeline’s AGMs, which are high quality and intended for marine use. We have 6 batteries on board: 4 wired in parallel in a dedicated cockpit locker that form the house bank, and two under the galley sink just forward of the engine compartment, one each for the generator and the engine.
Opening the house battery compartment, I could see that this was going to be a larger job than I’d expected.
Safety First
The first step was tracing and labeling cables, and figuring out what we were really dealing with. Older boats often have multiple owners who have added various components, typically to whatever standard was in effect at the time. Things that were done properly 10 or 20 years prior might not match current best practices, but redoing even a significant portion of an older system is a big enough job that unless you’re doing a refit (ahem), it’s impractical.
Today’s ABYC (American Boat and Yacht Council) standards specify that “ungrounded conductors shall be provided with overcurrent protection device(s) within a distance of seven inches (178 mm) of the point at which the conductor is connected to the source of power measured along the conductor”. In other words, we needed proper fusing inside the battery compartment, as the house battery bank is the “source of power” for every DC load on board. I started out by adding fuses (amperage interrupt capacity, or how much current a fuse can safely interrupt before arcing) for the primary battery bank, the inverter charger, the two DC distribution panels in the main cabin and nav station, and the electric windlass.
While I was at it, I also added a Blue Sea Systems disconnect switch between the new house batteries and the 1000amp PowerBus bars I was installing to serve as the common positive bus bar. This meant that one could open the compartment, turn a switch, and completely isolate the house bank.
I also replaced the negative bus bar, and while tracing wires, found that multiple different negative cables were running back to the engine block. This was also incorrect, as the common negative bar should be the termination point for every load on board, and should have a single large cable (2/0, in this case) running back to the engine. Parallel negative paths can result in all kinds of weird behaviors, and could explain some of the flickering LED lights I’d seen earlier.
While I was at it, I isolated the existing arch solar panels, running their connections to a 150amp bus bar, separated from the house bus via a second disconnect switch, and installed one more switch between the inverter/charger and the house bus. With these switches in place, it would be possible to disable all sources of power into the bus. Previously, the engine start battery was wired directly to the house bank, and with no disconnect service switches in place, it was nearly impossible to quickly disable power completely, including to the starter, where a short when working on something in the engine compartment could be dangerous.
Fixing the Charging System
When we bought the boat, there was a newer Xantrex charger/inverter that I believe Kim and Randy installed, as well as a second older ProMariner charger, and a third inverter in the galley. The Xantrex was the primary charger, and had a somewhat finicky control panel on the AC panel using the older “Heart Interface” system that Xantrex provided.

The old “Heart Interface” controller for the Xantrex inverter/charger
While good for its time, one of my goals was to convert the boat to a full Victron system for all electrical components. Victron offers a variety of components that interface with one another, and with a "Cerbo GX” - effectively a small computer that allows configuration and control of all of them - and a Multiplus II charger/inverter, we’d be able to manage and monitor the boat from anywhere.
One of the biggest challenges with wiring Blue Turtle is access, and replacing undersized wires, adding new ones, and connecting everything would be hard work even without being on the hard, without air conditioning, in the brutal heat of southern Georgia in the summer. Working until the salon reached 100F meant only having 3-4 good hours every day, and I chipped away at the project over the course of June and July. Slowly, old undersized cables were replaced with properly built 4/0 primary cables, and large gauge runs for various components. I swapped the old house DC distribution panel for a new Blue Sea setup, installed a touchscreen for the Cerbo, removed all of the old inverters and chargers in favor of the new Multiplus, and more.

The new inverter being installed

Upgrading the DC distribution panel

The Cerbo in action!
As of the end of July, the majority of the electrical work is done. I still need to wire the bilge pumps up to the new Water Witch system, eliminating the often problematic mechanical float switches with electronic ones, and rewire the alternator to use a modern Balmar MC-618 regulator, but we can now see the state of our electrical system from anywhere using Victron’s online management tool.
It’s comforting knowing how everything is configured, and being certain that we’re both in compliance with ABYC standards and also fully modernized.
What’s Next
With September looming, August will be quite busy. I still need to finish the electrical work, as well as ensure that the yard gets the new prop fully installed, and that we get our new speed and depth transducers installed. I’ve completed the majority of the SeaTalk network installation (Raymarine’s proprietary network for the instruments), added a “black box” VHF behind the old nav station, and setup a new mic at the helm, but the transducers need to be completed by the yard per their regulations.

Instruments being installed

Dedicated helm VHF
As the weather cools this week, I’ll be in the “back yard” - a hot, hornet-and-fire-ants infested place - working on installing the new steaming light, tricolor light, windex, and Raymarine wind instrument. Once those are done, the mast will be ready to be re-installed.
The chainplates are STILL on order, as the fabricator made a mistake on the second set. While being fixed on their dime, it’s still yet another delay, frustratingly. Once the plates are one, we’ll need to schedule with a local rigger to get the mast brought to the boatyard, hire a crane to lift it back in, and get our rigger back out to Brunswick to complete the setup.
In the meantime, we’ve had an number of fiberglass repairs done - there was a crack in the bow, likely from a grounding somewhere over the years, as well as a poorly-repaired crack under the generator’s exhaust through-hull on the transom. Both we properly dug out, filled with thickened epoxy, and re-glassed. Working with an amazing local fiberglass guy, we’re preparing to wet sand and completely re-gelcoat the topsides, as well. By the end of the month, fingers crossed, she’s going to look like a new boat!