
Removing the Chainplates
April 2025
With the boat now securely on the hard, and the mast off, I’ve started planning out projects for the summer.
The challenge with any refit, from what I can tell having done a couple now, is that it will always grow to be unexpectedly bigger, harder, and more expensive than you thought.

“Yachtsmen are consumed with the notion that their boats must be one hundred percent sound. They are oblivious to the fact that the majority of the world’s working vessels are plagued by rot. Yet these are the ships that do the work, year after year, no holds barred when it comes to weather.”
-Sterling Hayden, Wanderer
Moreover, I have a perfectionist nature and a seemingly insatiable desire to tinker. It’s not a particular good combination, I’m afraid. I ceaselessly want to improve things, and when I do, I want them to be as correct as possible.
I started this project with a spreadsheet, and the major items on it were all rig-related: replace the old standing rigging and upper tangs, inspect and replace the chainplates, order running rigging and sails. That list has expanded dramatically, and I’m behind in my blog posts, alas.
That said, let’s begin where I did - with the chainplates.
Chainplates Pulled, Redesigned
With the rigging on order, inspecting the chainplates were my first priority, after seeing the condition of the tangs.
I kicked this project off online, researching what other CSY 44 owners have done over the years. One of the most notable sites that covers CSY boats is Sherry and Dave’s incredible https://svsoggypaws.com. While they have sold their CSY and moved onto a catamaran, they (very helpfully) left their original workshop pages up, with great detail on the various projects that they did over the years, chainplates being among them.
What I found was that the design of the chainplates from CSY was flawed, an artifact of a time when we understood less about how stainless steel ages in the marine environment.
On the 44, the chainplates go through the caprail, which means that water eventually does, as well. Water, salt, and a low/no oxygen environment results in crevice corrosion. Crevice corrosion on chainplates is often accompanied by rust, and rusty, corroded chainplates can and do fail catastrophically. When they do, they can take down the rig, often in heavy weather at at great risk to crew and boat alike.
At minimum, I needed to pull the plates to inspect them. I knew they were far past the typical 7-10 year replacement window, so that meant cutting into the cap rails. I was leery of cutting back the rub strake, so my pan was to widen the caprail penetration enough for tangs to be able to wiggle back and forth. I’d drill out the upper rail sufficiently to expose the bolt head and remove the bolt, pry the plates off the lower bolts, cutting them back as needed with an angle grinder in order to do so.
After a nightmarish few days of work, I had the first plate freed.
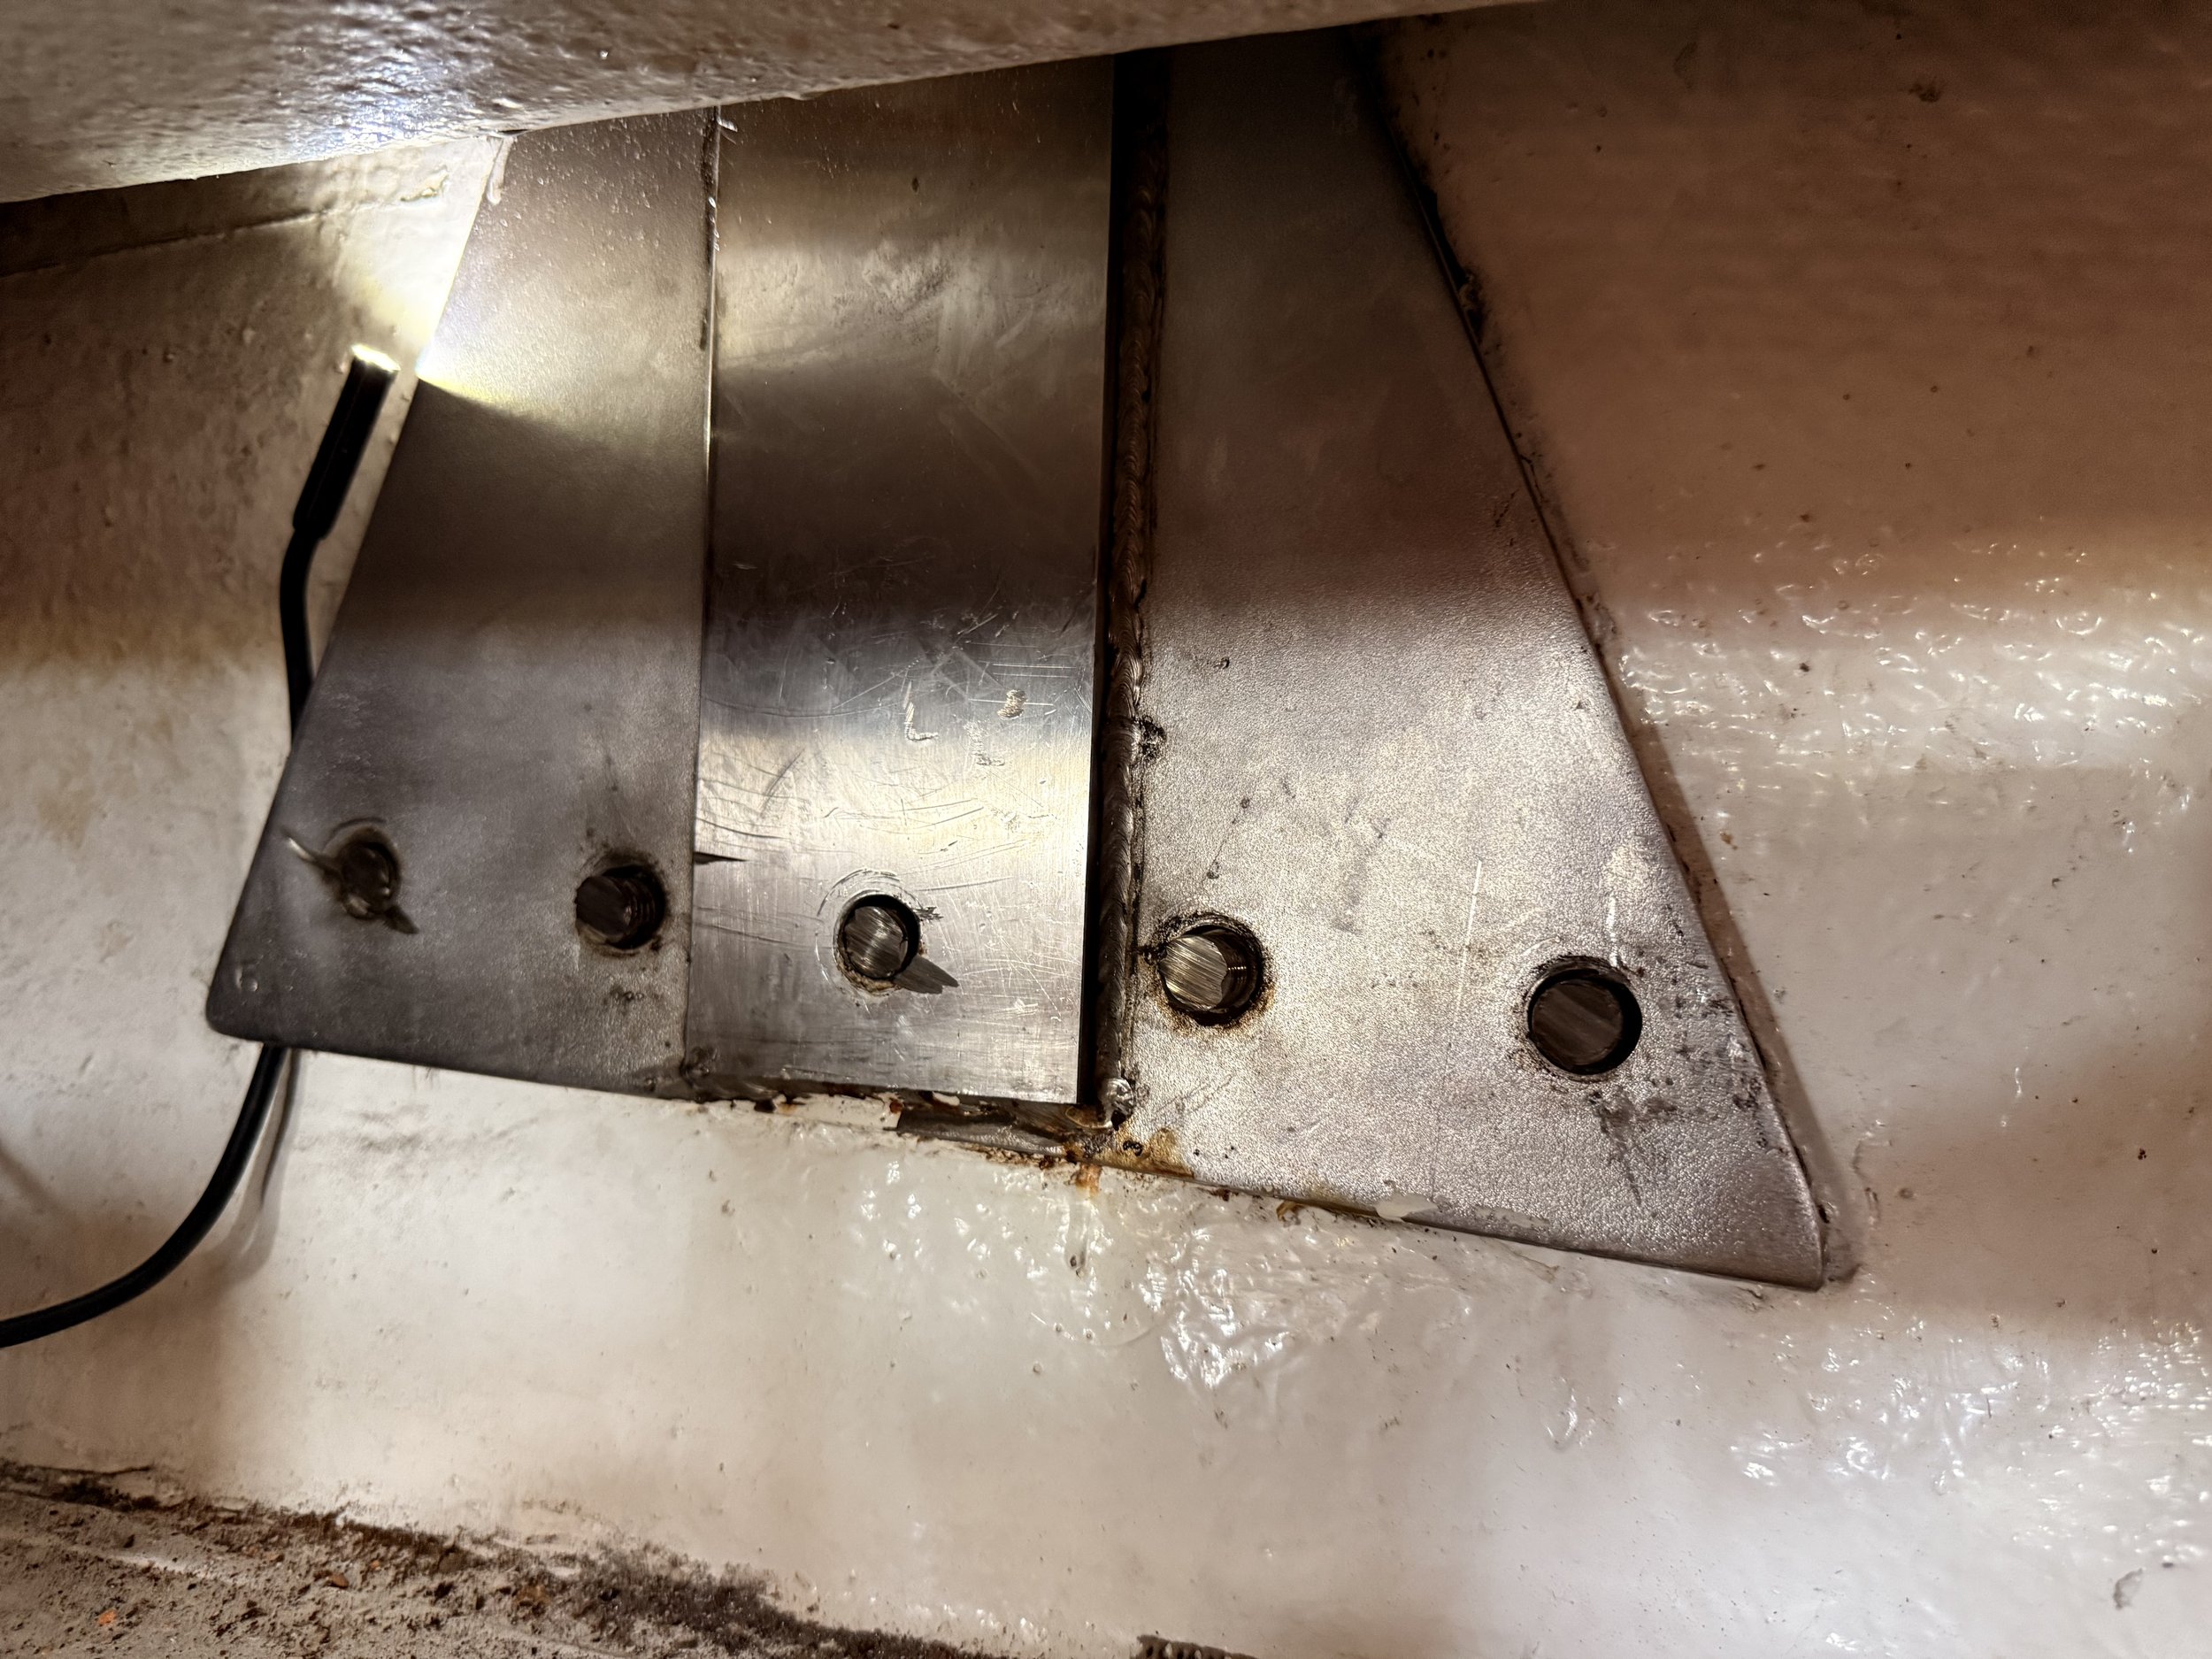
Just before I pried the first plate off.
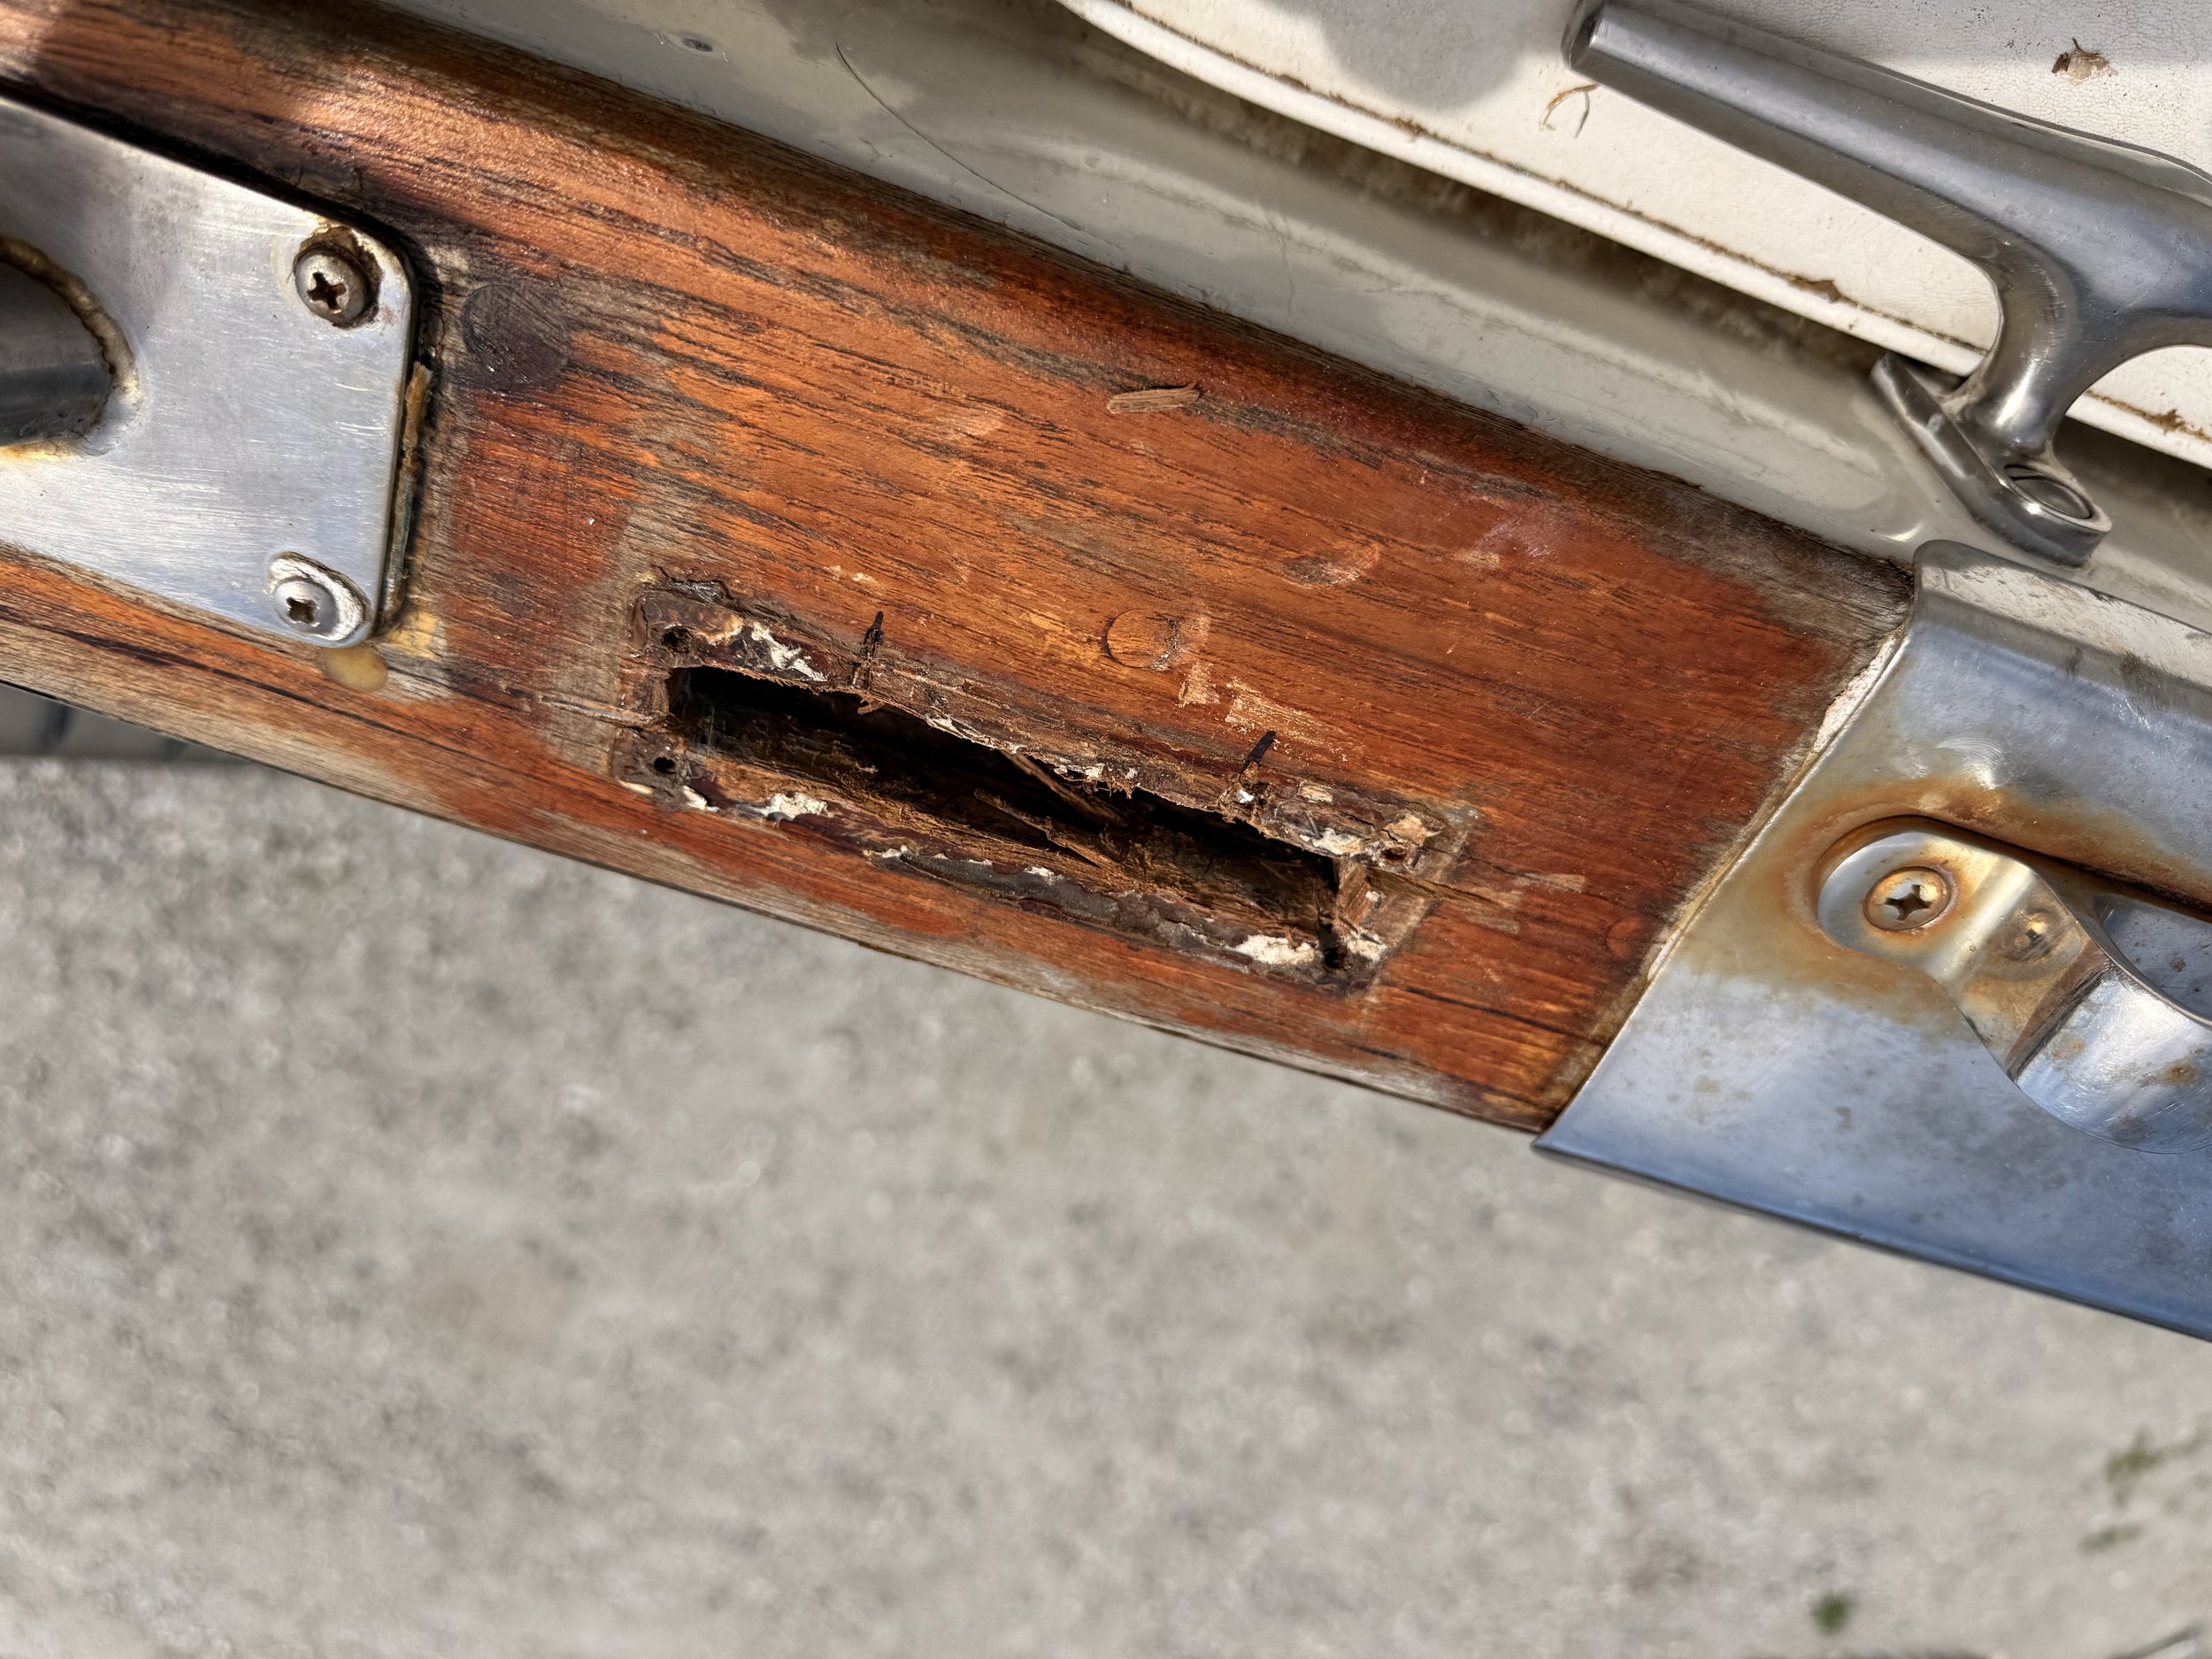
The damage to the caprail after removing the first chainplate.
5 of the six plates came out. I can’t say “easily”, but they did get removed; the last, the port forward lower shroud, was buried behind a small cabinet in the salon. I had no choice but to cut the back of it out - wood can always be replaced, after all.
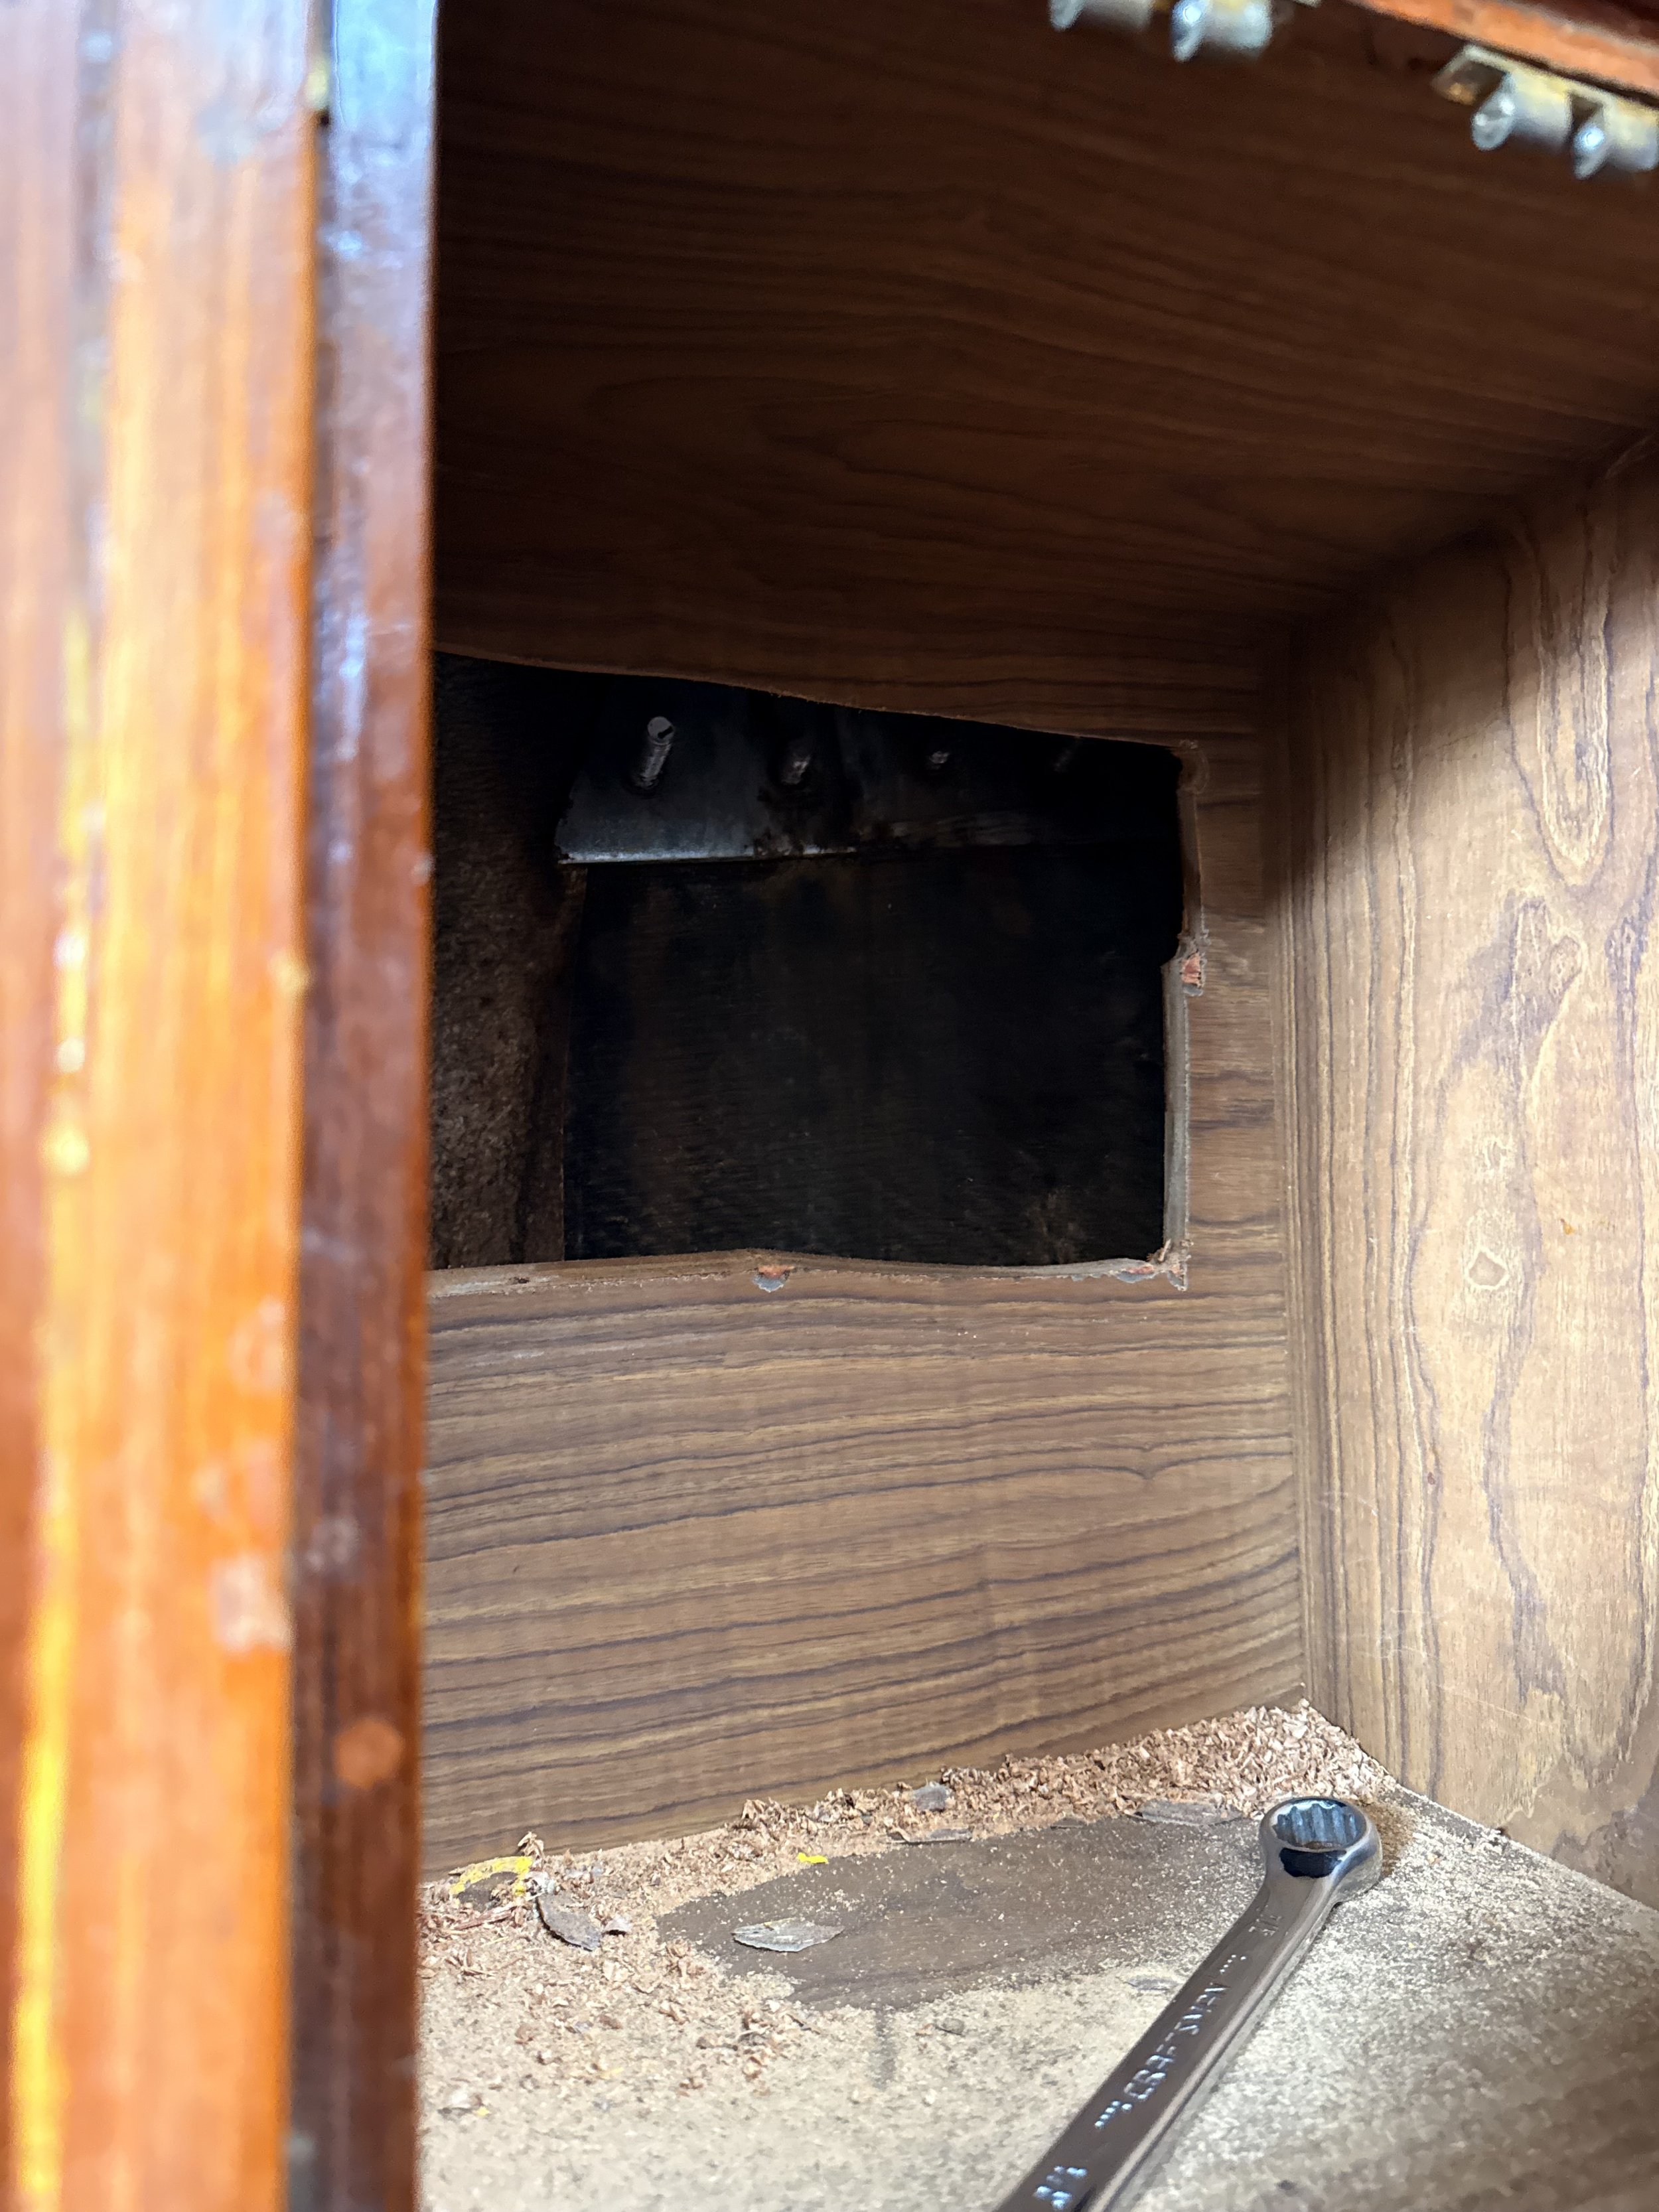
Cutting the cabinetry open to access the plate.
Joy had to help me with this last plate, as I couldn’t fit my arm up against the top bolt with a wrench to hold its nut. Every other plate I managed with a pair of vice grips, but this required a more deft (and smaller) hand.
With some effort, we managed to get the final plate out. Inspection after the fact made clear that this was the right choice - they were all heavily corroded.
I filled the cap rail holes first with thickened epoxy, and then topped the epoxy with sandable, stainable wood filler, which I sanded down to flush with the rail. On my to-do list while on the hard is to redo the brightwork, so my hope is that this will largely disappear once I refinish the wood.
The initial fill of the holes.
Looking back at Soggy Paws’ site, which includes various other owners’ redesigns, I settled on an external plate design - a 10” wide round plate, made of 1/2” 316L highly polished stainless steel, with 8 countersunk bolts. Moving to this kind of external plate would give us both a stronger and more corrosion resistant material as well as easy inspectability and replacement in the future. I had two problems to solve: first, the only designs still out there are photographs of hand-drawn sketches, and second, the fabricator who made these plates for other CSY owners, Rick Heim, had passed away in 2021.

The only remaining image of the external plate redesign, image rights to Dave, https://svsoggypaws.com/CSY/rig.htm#Chainplates

The plates installed on SV Soggy Paws, image rights to Dave, https://svsoggypaws.com/CSY/rig.htm#Chainplates
I first cleaned up the hand-drawn design image in Photoshop, and began calling around to local fabricators and shops across the US. My initial hope was that a local shop in Brunswick that the marina recommended might take it on, and they said they could. However, I was left playing phone (text?) tag for over a week, without any forward movement. I finally got a reply from the manager who said they either could not or would not consider the job after all.
I had similar luck with every place I contacted - a small run of expensive steel just wasn’t compelling, I expect.
Joy had a great suggestion: my brother-in-law Michael. Michael is a robotics engineer in Boston, and has relationships with fabricators around the world, as well as CAD expertise. After a couple of phone calls, he helped more extensively than I could have asked for, turning my rough sketch into a proper CAD file, and reaching out to multiple machine shops for quotes.
Domestic production looked like it would cost roughly $12,000 (!), whereas Dave notes that having the same plates made circa 2007 cost “$1500” because “the cost of SS has skyrocketed”. While I had really hoped to have the plates made in the States, offshore production came in at just under $4,000 - expensive, but the best price I could find. I approved the work, wired the funds, and as of this writing am waiting on final shipment.
Once in hand and installed, I’ll do a full and more technical writeup under the Projects section of the site, and with permission include the CAD files.
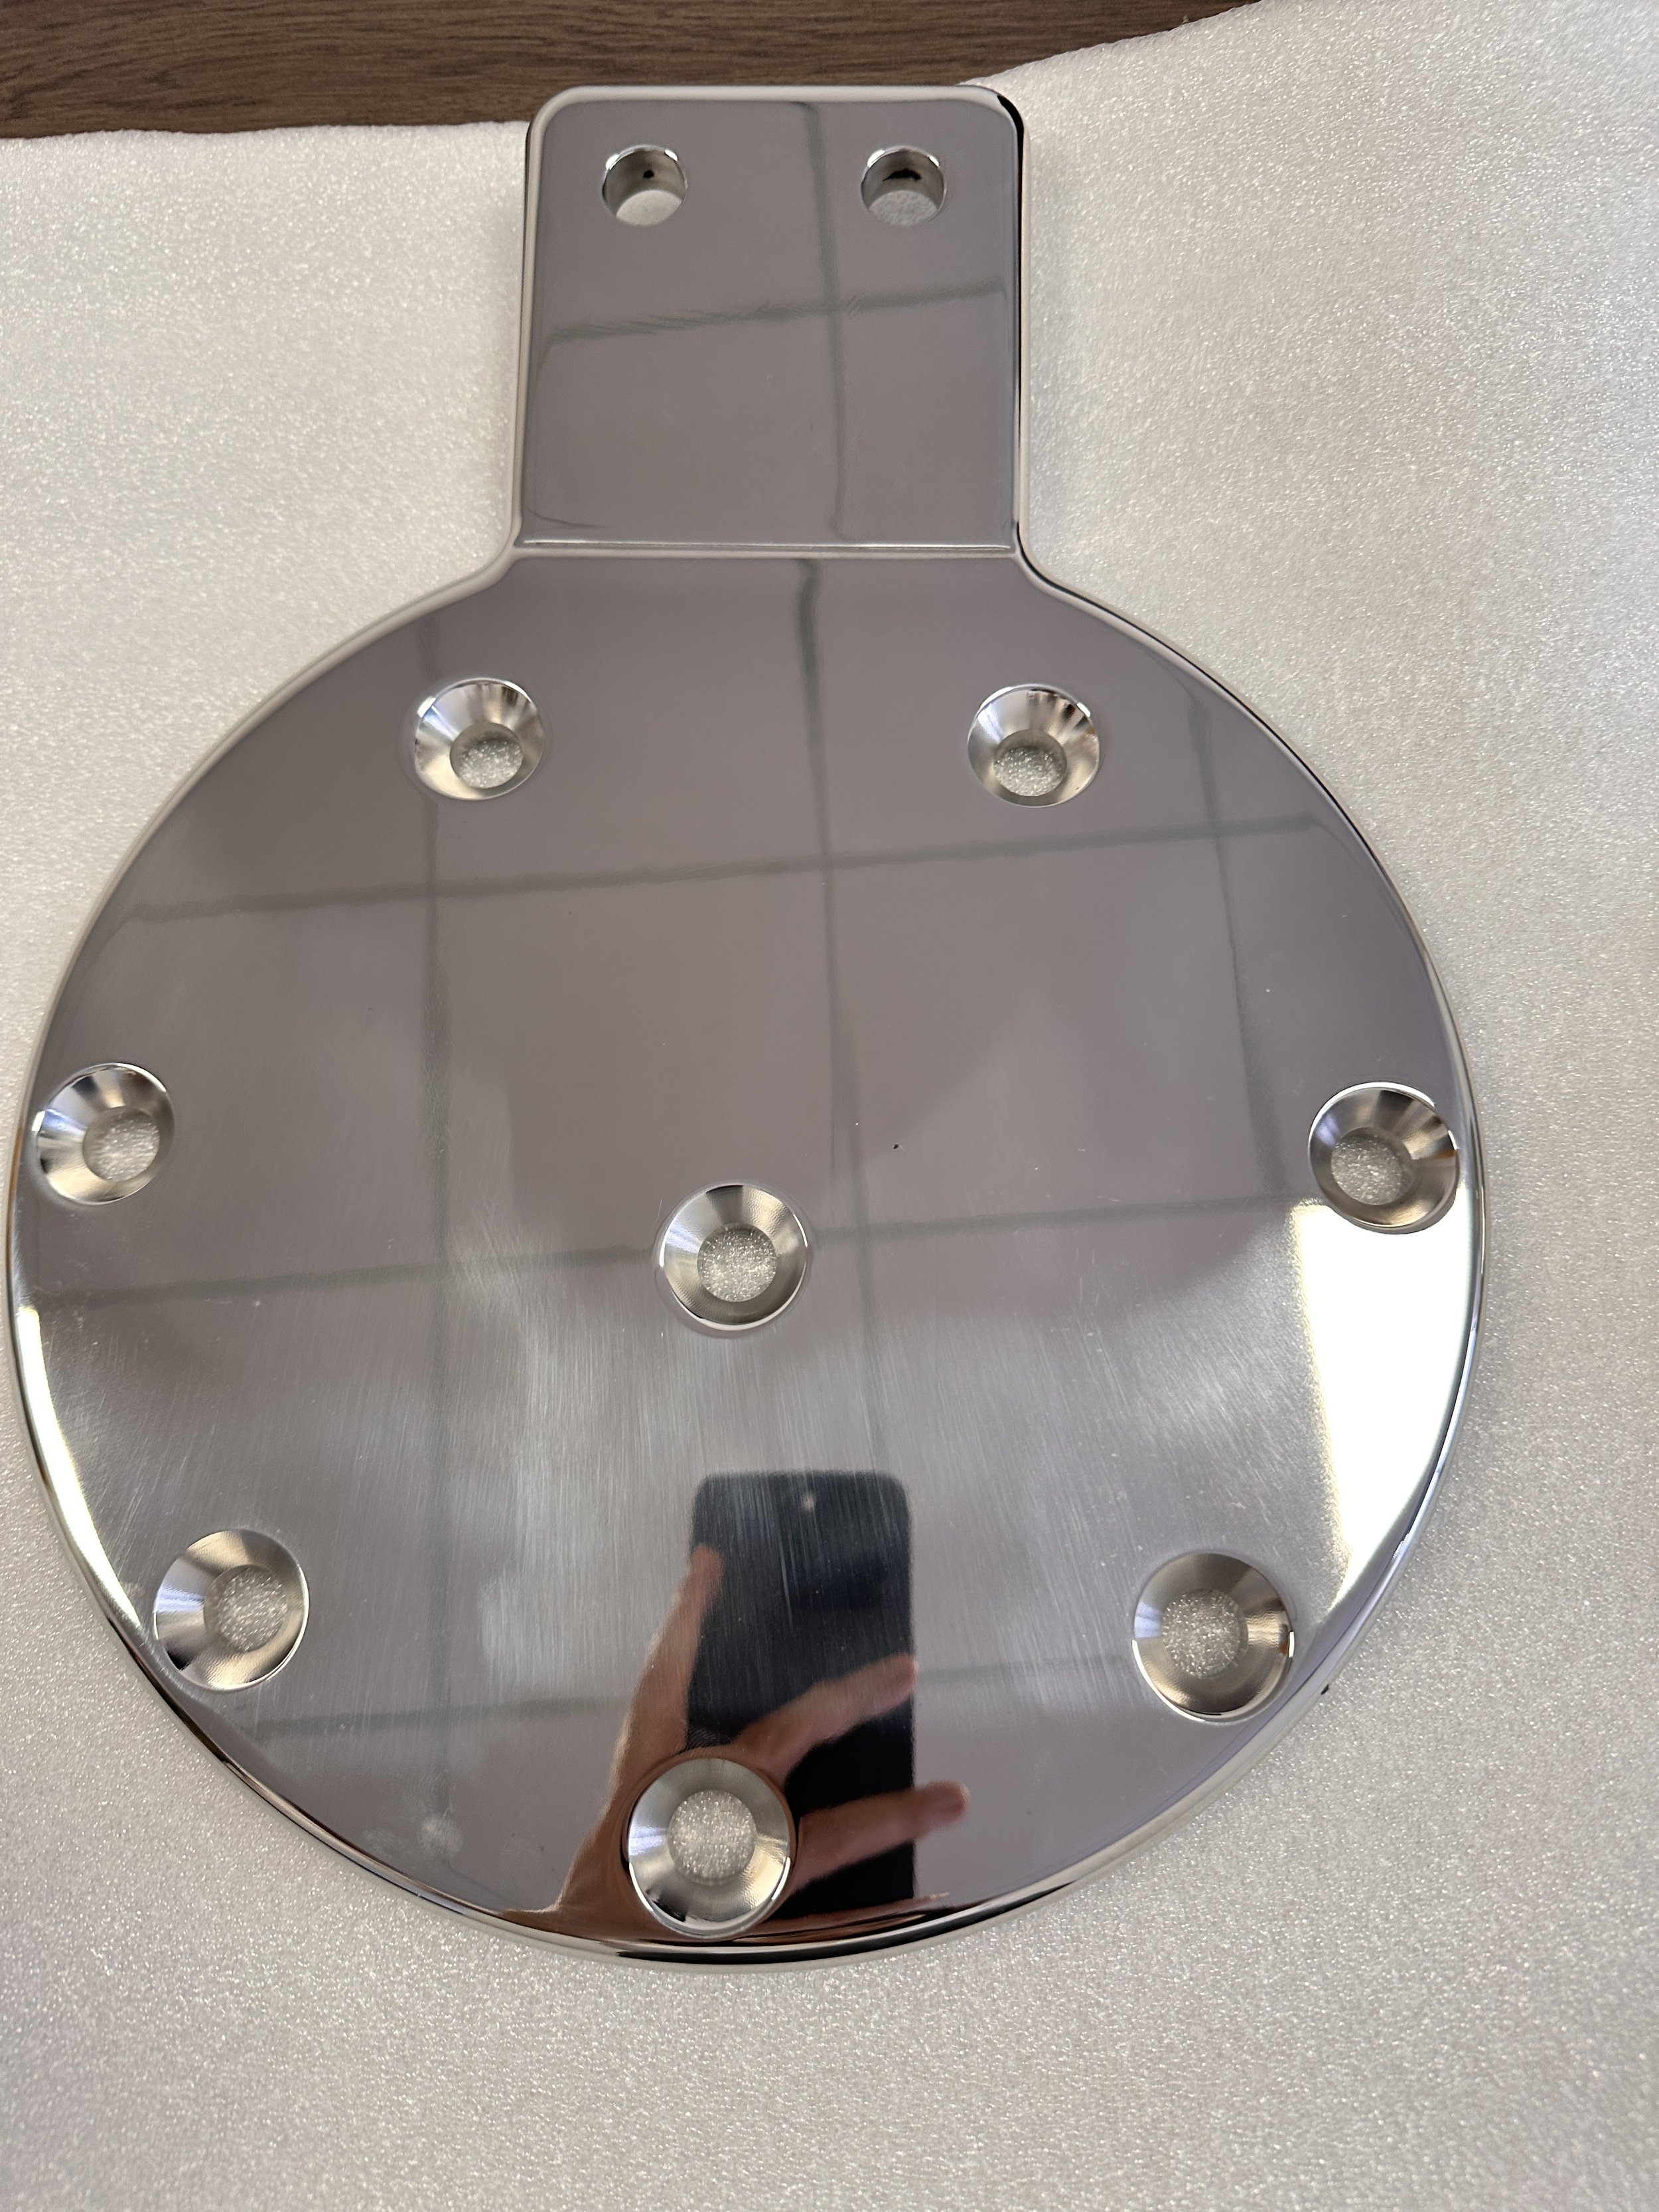
The plate on the bench in China, handpolished, but pre-electropolishing.
While this was going on, we began working to replace the fixed propeller with a 24” MaxProp feathering model. Of course, nothing with boats goes smoothly - and yet another task grew beyond its initial scope. More to come next time, as we take an angle grinder to the prop shaft itself…